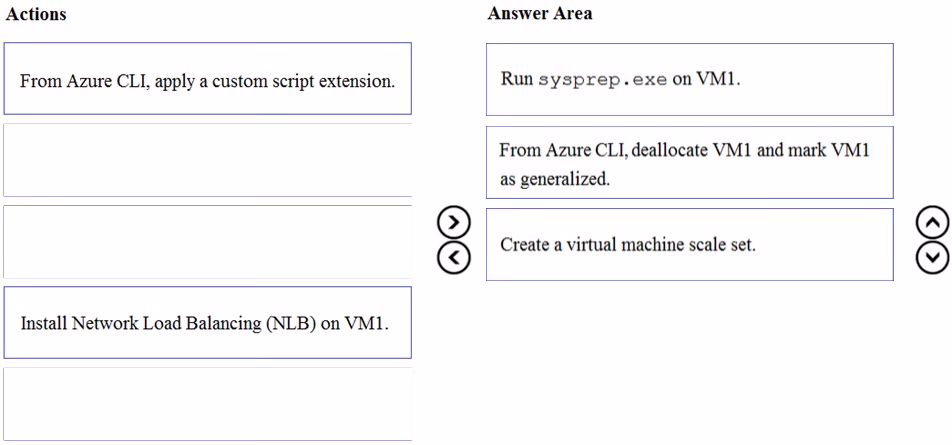
Step 1: Run sysprep.exe on VM1.
The final step to prepare your VM for use as a custom image is to generalize the VM. Sysprep removes all your personal account information and configurations, and resets the VM to a clean state for future deployments.
Step 2: From Azure CLI, deallocate VM1 and mark VM1 as generalized,
To create an image, the VM needs to be deallocated. Deallocate the VM with Stop-AzVm. Then, set the state of the VM as generalized with Set-AzVm so that the
Azure platform knows the VM is ready for use a custom image. You can only create an image from a generalized VM.
It may take a few minutes to deallocate and generalize the VM.
Then create an image of the VM with New-AzImageConfig and New-AzImage.
Step 3: Create a virtual machine scale set.
Create a scale set with New-AzVmss that uses the -ImageName parameter to define the custom VM image created in the previous step.
References:
https://docs.microsoft.com/en-us/azure/virtual-machine-scale-sets/tutorial-use-custom-image-powershell